A tractor and a few implements can make light work of preparing a home vegetable patch. All you need is an area with good exposure to the sun, access to water and a bit of soil preparation.
Sunlight
Plants need sun to grow. You need to choose a location with a minimum of 4-5 hours direct sunlight per day – the more the better. Where possible choose a location facing north to north east to capture morning sun. Avoid shadows from trees, buildings etc.
Drainage
Good drainage is essential for a successful vegetable garden. Select a location that is well drained or it may be necessary to install some ag pipe drainage.
A level site is easier to work on. If it is necessary to set up on a slope, run the beds across the slope and build a simple retaining wall on the low side to prevent loss of soil from erosion.
Wind
Shelter from wind will protect plants against damage and also minimise evaporation. Be careful though that your sheltered location still has access to sun.
Water
You’ll need water too! Ideally you can choose a location which will enable water to gravity feed from a tank. Otherwise a pressure pump may be required.
WHAT TO PLANT WHEN
Some vegetables grow better in cooler conditions and some others in warmer conditions.
Plants that grow better in cooler months (10 – 20°C) include cauliflower, broccoli, brussel sprouts, onions, turnips, peas and broad beans.
Plants that grow better in warmer conditions (20°C or above) include tomatoes, capsicum, potatoes, sweet potatoes, sweet corn and eggplant.
Other plants grow best between 15 and 25°C. Examples include lettuce, cabbage, celery, silver beet, radish and parsnip. This group of plants are more sensitive to being planted
too early or too late. It is best to consult a gardening guide to find the best time to plant for your area.
A handy hint – don’t plant your entire crop at once. By spreading your planting over time you will enjoy a crop over an extended period rather than getting too many vegetables all at once.
PREPARING THE SOIL
| First you will need to kill off the grass and weeds. This is often done with a glyphophosphate based product. Or if you prefer an organic approach simply cover over the area with old sheets of metal / cardboard or newspaper until the grass is dead. |
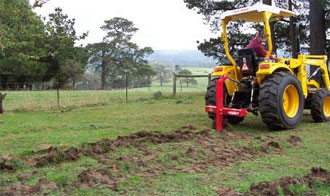
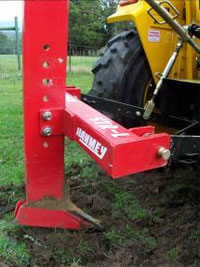
Next you will need to break up the soil. A variety of implements can be used to do this. As a relatively small single bed was going in, a ripper and rotary hoe was used here. (If you plan a large area of multiple beds a disc harrow would be useful to heap up the beds.) The ripper came in handy to scratch up the ground first as it was quite hard. The desired depth to dig is around 25 – 30 cm without bringing the subsoil / clay to the surface. |
|
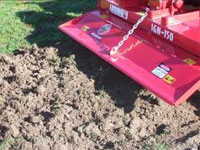
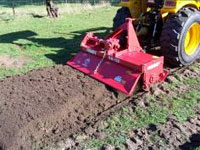
| Then the rotary hoe was used to further break the soil up. A number of passes are required. Initial passes are done with the rear flap raised. This allows soil to pass through the rotary hoe in relatively large pieces so the equipment is not overloaded. In subsequent passes the rear flap can be lowered. This retains the soil in the implement for longer so it is broken up more finely. |
The addition of organic material such as manure or compost will benefit most soils to add nutrients and improve soil structure. The application of a general purpose fertiliser containing nitrogen, phosphorous and potassium will help most plants. For best results consult a gardening guide. |
|
The rotary hoe makes it really easy to add fertiliser and organic material. Simply throw the desired amounts on top. One pass with the rotary hoe – job done.
|
|
Hand watering vegetable plants |
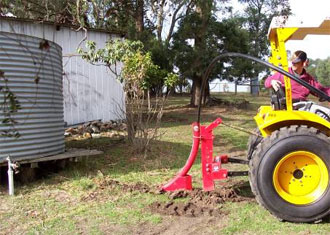
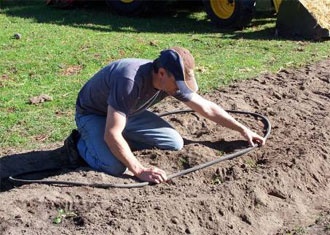
Laying irrigation pipe with a ripper and pipe layer attachment |
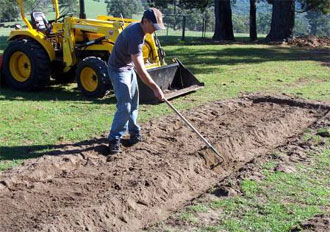
Best results are achieved by heaping the garden bed. This promotes drainage and exposes the sides of the garden bed to the sun for greater warmth. The bottom edge of the garden bed also becomes a handy place to walk while weeding.
As this was a relatively small bed, the heaping was done by hand with an “old fashioned” hoe.
Once the bed is prepared, you need to wait a week or so and see if any more weeds pop up. It’s easiest to get rid of these by pulling by hand or with a hand hoe.
PLANTING
You can plant seeds or seedlings. Seeds are a lot cheaper – it just takes a little longer and a bit more work to get results. Follow the directions on the packaging for sowing depths and spacings. For seeds or seedlings you basically make a small hole, place them in, cover with soil and water it in well.
IRRIGATION
Ongoing watering is essential. The ripper used to set up this garden also has a pipe laying attachment. It scratches a trench and buries polypipe all in the one action. This made it very easy to install the main pipe from the water tank to the garden bed.
Slow release systems that discharge water close to the soil are most water efficient. They also don’t spray water on the leaves which minimise foliage disease. Examples of these are drippers, soaker hose or porous hose.
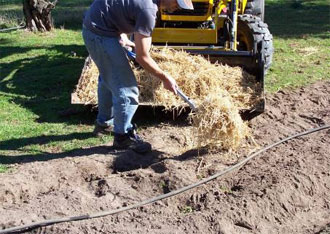
MULCH
Putting a protective layer on your garden bed helps keep moisture in and minimise weed growth. Material such as sugar cane and straw are often used. Mulch should be no more than about 3 – 5 cm thick so it allows water to penetrate it and air to circulate.
MAINTAINING YOUR GARDEN
Maintaining your garden will require some commitment of your time but many people find it very rewarding. Regular weeding is required to maximise plant growth. Hand watering or monitoring of your irrigation is essential. And in some instances ongoing fertilisation or pest control will be needed.
It will be all worth it when you enjoy your fresh home grown vegetables.
Laying pipe for watering garden |
|
Covering pipeSafety is always the highest priority. Always use a tractor that complies with Australian Standards, including Roll Over Protective Structure, seat belt and protective covers. Only take on tasks within the capability of the machine and operator. Follow all relevant safety warnings, instructions and regulations. Wear appropriate safety equipment and use common sense.
* This article is a general guide only. Conditions vary from site to site. Judgement relating to your individual conditions must be exercised. East Wind Tractors, Hanmey Implements and refurbished tractors feature in this article.


 中文版
中文版

 Heaping the soil of the garden bed
 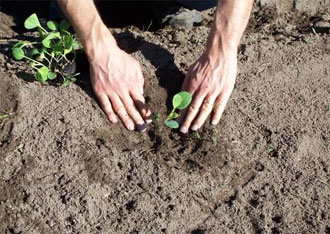 planting vegetable seedlings
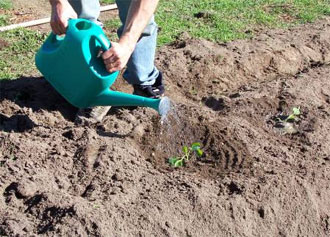


View More(Total0)Comment Lists